
Bite into Bliss with Our Easy Brownie Cookies Recipe
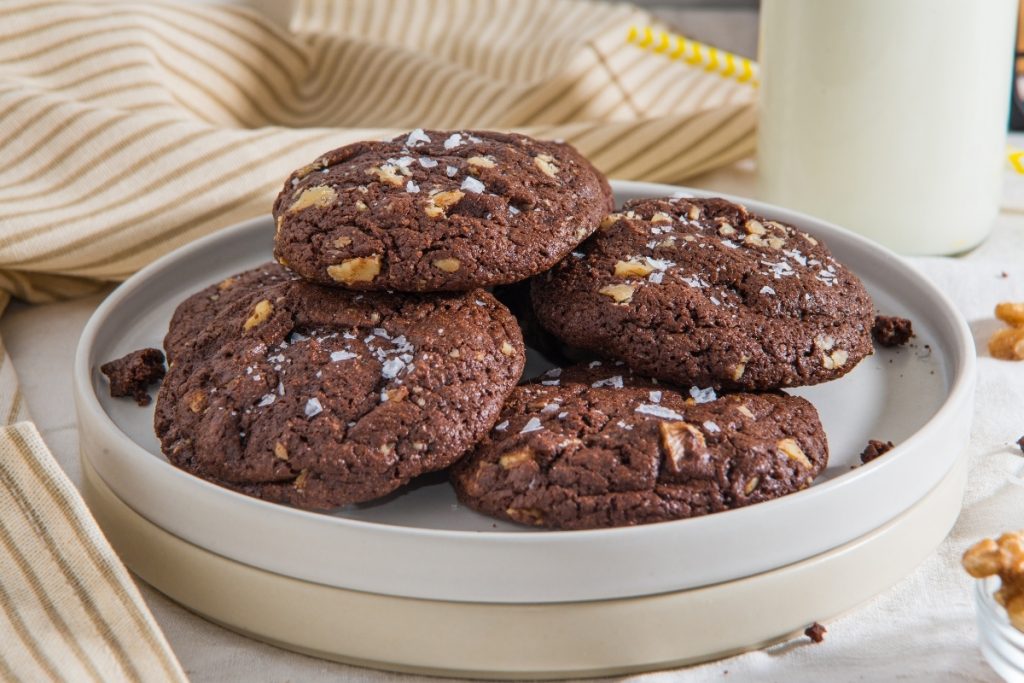
If you’re craving a treat that’s both indulgent and incredibly simple, these brownie cookies are your go-to delight. They blend the rich, fudgy flavor of brownies with the comforting texture of a cookie into one irresistible bite.
With a few easy steps and common ingredients, you can whip up a batch of these scrumptious cookies that feel like a personal reward after a long day. Their deep chocolate taste and chewy texture make them perfect for any time you want a little pick-me-up or a sweet ending to a family meal.
Download the full recipe now and get ready to enjoy a taste of pure chocolate bliss!
Can’t make it now? Save it to Pinterest for later

Equipment You Will Need
- Cookie scoop #20
- Mixing bowl
- Baking sheet
- Parchment paper


Brownie Cookies
- Total Time: 1 hour and 15 minutes (with 30 minutes of chilling)
- Yield: 17 cookies 1x
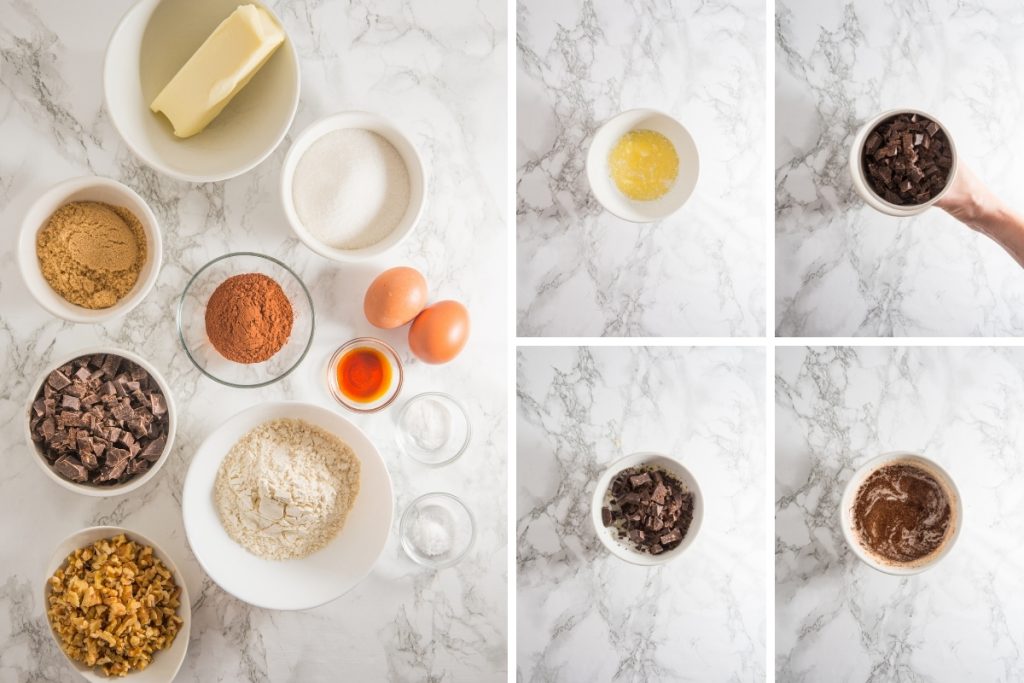
Ingredients
1 1/2 cups of chopped chocolate
1/2 cup of butter, melted
2 eggs
3/4 cup sugar
1/2 cup packed brown sugar
1 teaspoon vanilla extract
1/2 teaspoon baking powder
1/2 teaspoon salt
3/4 cup flour
1/4 cup cocoa powder
3/4 cup chopped walnuts
Instructions
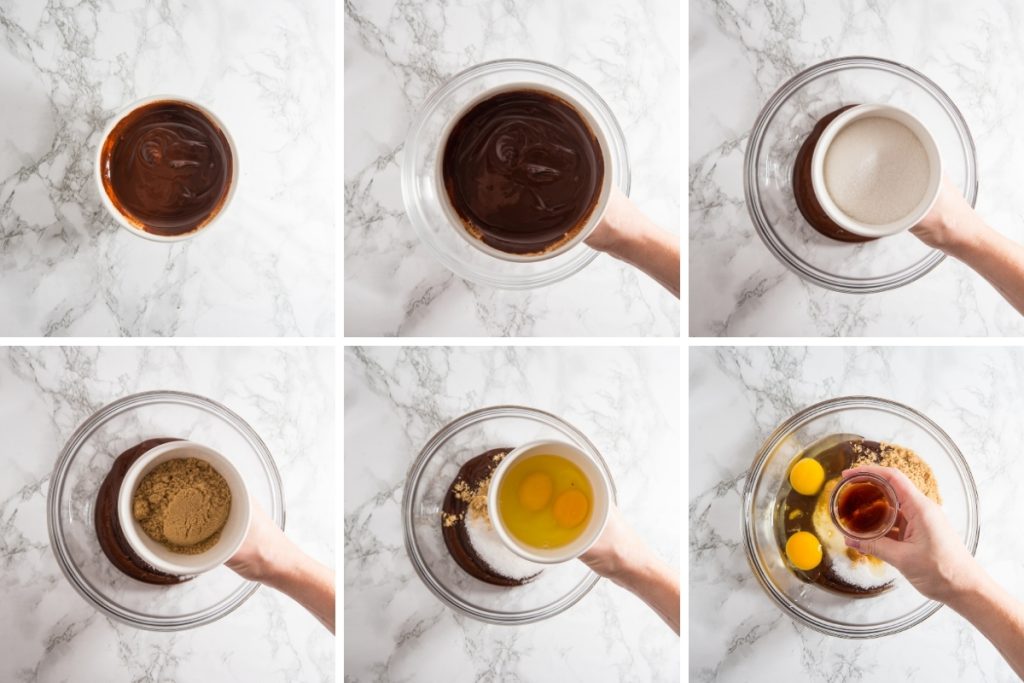
- Melt the chocolate: In a bowl, mix the melted butter with the chopped chocolate. Stir until the chocolate is completely melted and the mixture is smooth.
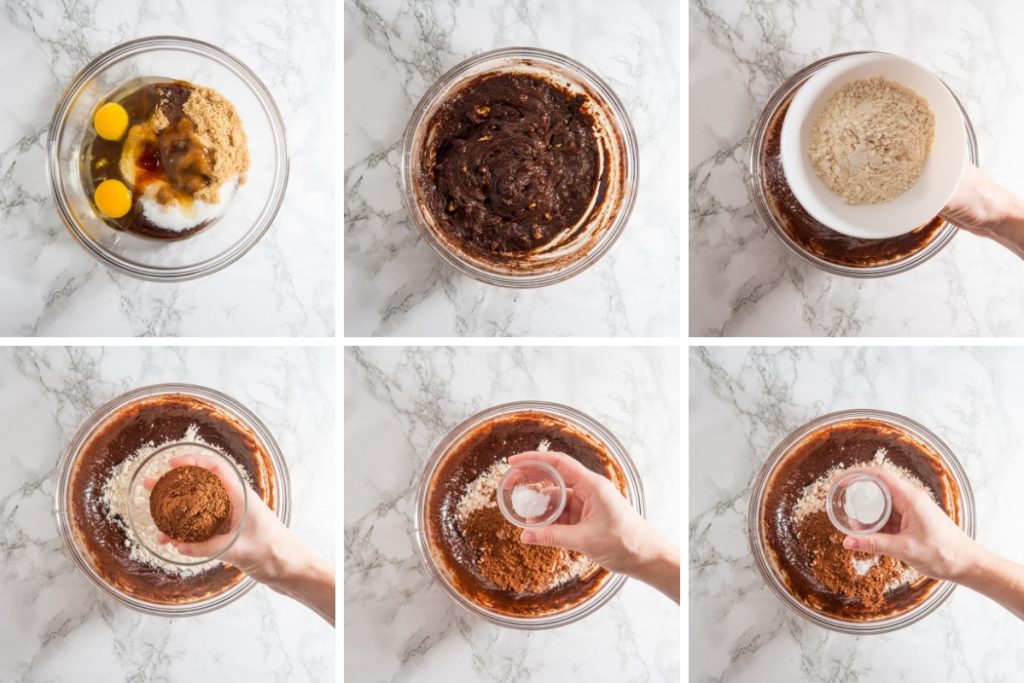
- Mix the wet ingredients: In a large bowl, add the melted butter and chocolate mixture, eggs, sugar (both white and brown) and vanilla extract to the chocolate mixture. Stir until all ingredients are completely combined.
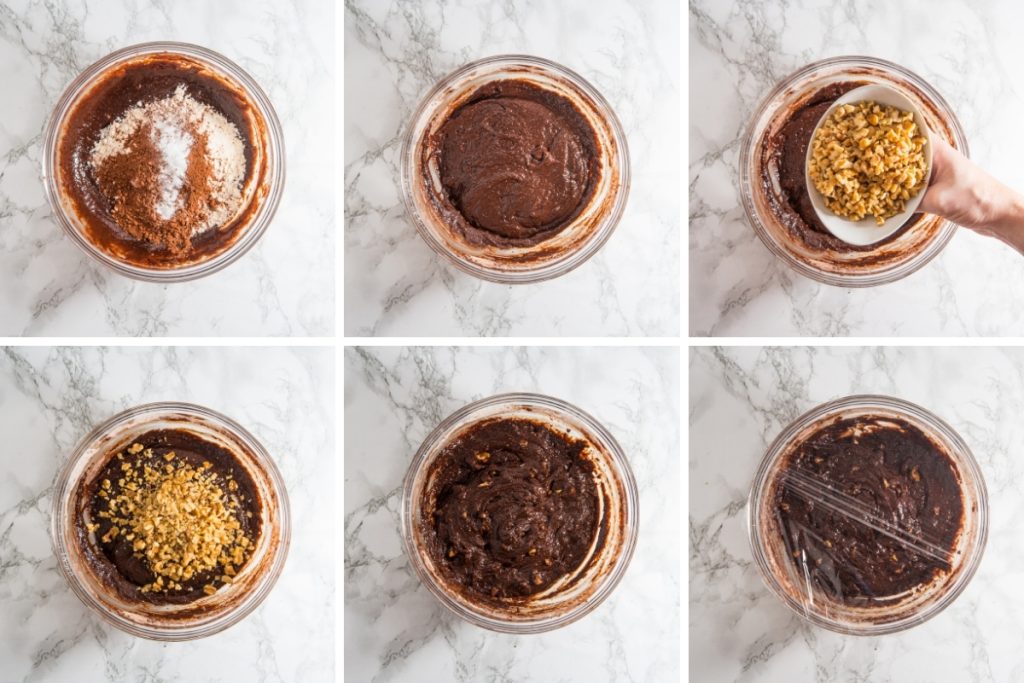
- Incorporate dry ingredients: Add the flour, cocoa powder, baking powder, and salt to the wet mixture. Gently fold the dry ingredients with a spatula until the dough is smooth and there are no lumps.
- Add the walnuts: Stir in the roughly chopped walnuts, making sure they’re not too finely chopped so you can enjoy their crunch in the cookies.
- Chill the dough: Cover the bowl with the dough and refrigerate for at least 30 minutes (preferably 2 hours for the best texture).
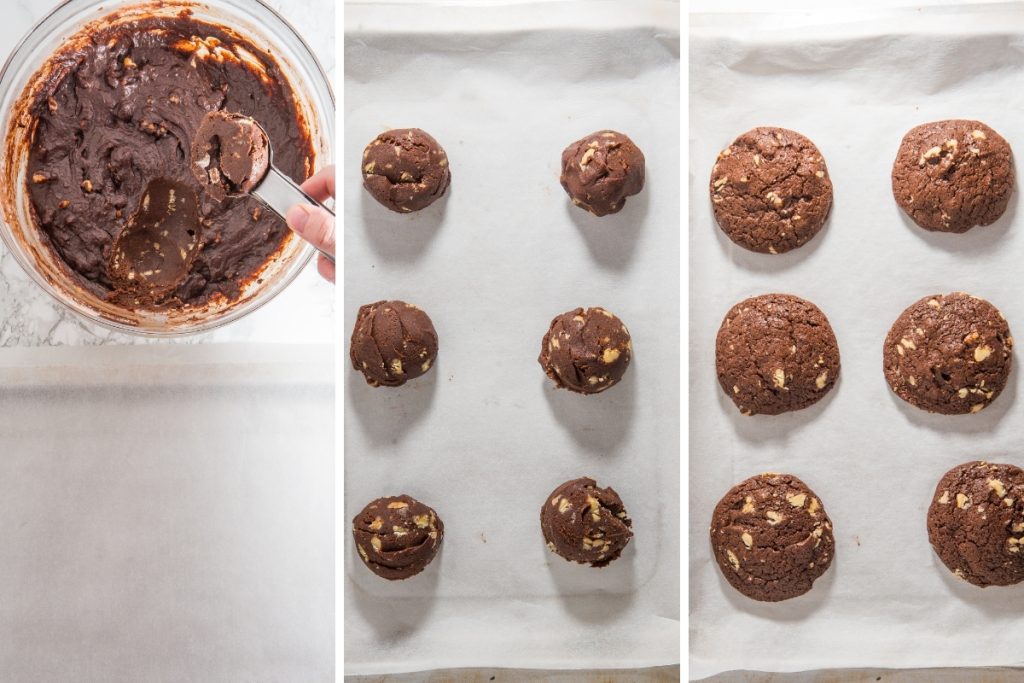
- Shape the cookies: Preheat the oven to 350°F (180°C). Using a cookie scoop (#20) or a large spoon, shape the dough into evenly sized balls and place them on a baking sheet lined with parchment paper.
- Bake: Bake the cookies in the preheated oven for 15-16 minutes. They will be soft when removed from the oven, but will firm up as they cool.
- Cool down: Let the cookies cool on the baking sheet for a few minutes before transferring them to a wire rack to cool completely.
- Enjoy: Serve the brownie cookies warm or at room temperature to enjoy the best texture.
Notes
Chocolate quality: For best results, use good-quality chocolate with 60-70% cocoa content.
Packed brown sugar: Ensure you pack the brown sugar tightly when measuring it, as this affects the cookie’s texture.
Chilling time: While 30 minutes is sufficient, chilling the dough for 2 hours or overnight will help the cookies hold their shape and enhance their texture.
Ingredient temperature: Let the melted butter and chocolate cool slightly before adding the eggs to prevent them from cooking in the mixture.
Baking caution: Avoid over-baking the cookies. They will appear soft when you take them out, but they will harden as they cool.
Storage: Store the cookies in an airtight container at room temperature for 3-4 days. You can also freeze the dough or baked cookies.
Cookie size: A cookie scoop helps keep the size uniform, but if you don’t have one, a large spoon works as well.
Variations: Feel free to add extra chocolate chips, white chocolate chunks, or additional nuts like almonds or hazelnuts.
Intense flavor: If you want a more intense chocolate flavor, add 1 teaspoon of instant coffee powder to the dough.
Reheating: If you prefer warm cookies, you can microwave them for a few seconds to soften the chocolate again before serving.
- Prep Time: 15 minutes
- Cooling Time: 10 minutes
- Cook Time: 15-16 minutes
- Category: Sweet Treats
Step-by-Step Process
These brownie cookies are ideal for cozy family movie nights, friendly gatherings, or a well-deserved treat anytime.
If you love this recipe, be sure to check out our Strawberry Cheesecake Brownies and Easter Egg Robin Brownies recipes for more delicious inspiration, along with other creative Sweet Treats recipes on our blog.
© Little Party Pixie 2026


