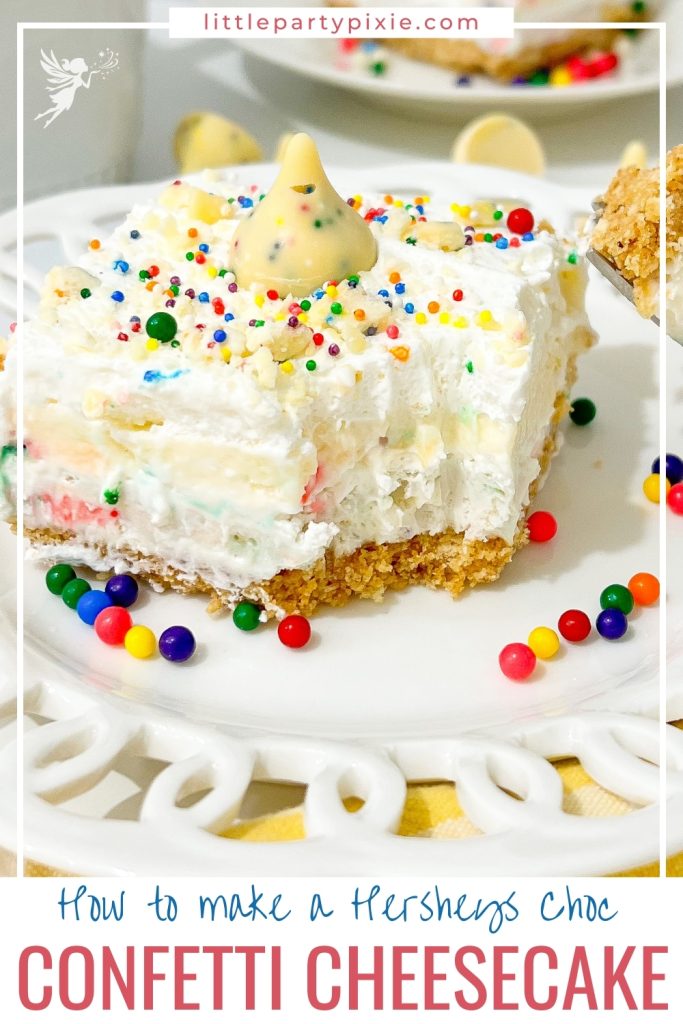
No-Bake Hershey’s Birthday Cheesecake That Steals the Show
If you love desserts that are creamy, colorful, and full of fun, this Hershey’s Birthday Cheesecake is a must-try.
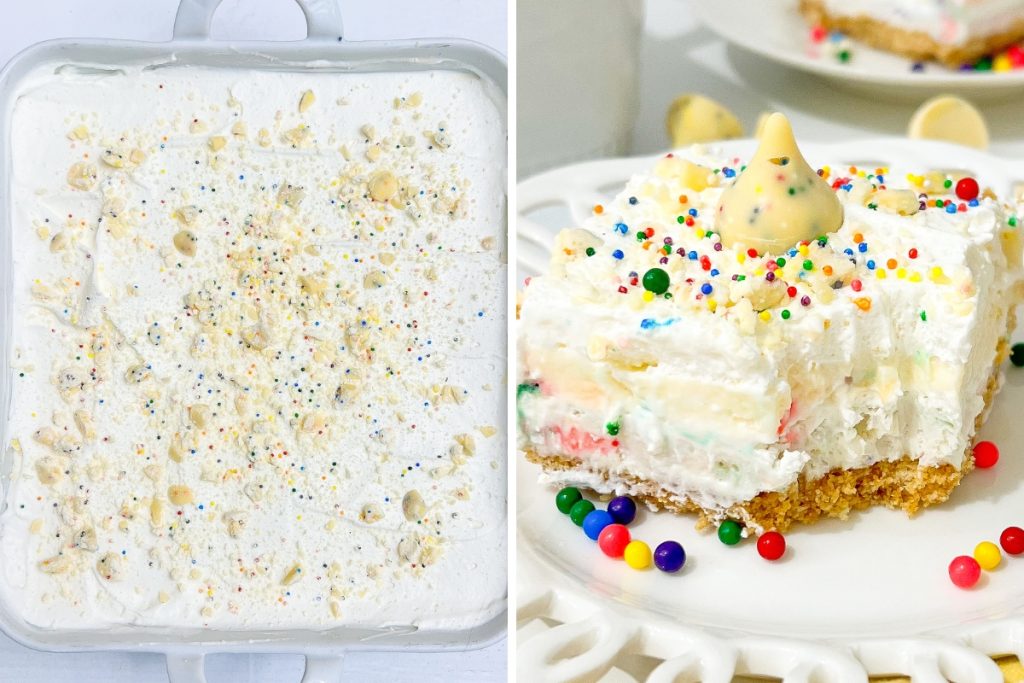
It’s a simple, no-bake recipe layered with a buttery graham cracker crust, a sweet and fluffy cream cheese filling, a vibrant pudding layer, and plenty of sprinkles for that festive touch. The best part? Crushed Hershey’s Kisses Birthday Cake flavor are mixed in for a delicious crunch and a cake-flavored chocolate twist that makes each bite extra special.
Made in an 8×8 pan, it’s just the right size for small celebrations or whenever you want a treat that feels like a party. Easy to make ahead and kid-approved, this chilled dessert is as fun to make as it is to eat.
Can’t make it now? Save it to Pinterest for later
Equipment You Will Need
- Measuring cups and spoons
- Spatula
- Food processor
- Mixing bowls
- Electric / hand mixer


Hersheys Birthday Cheesecake Recipe
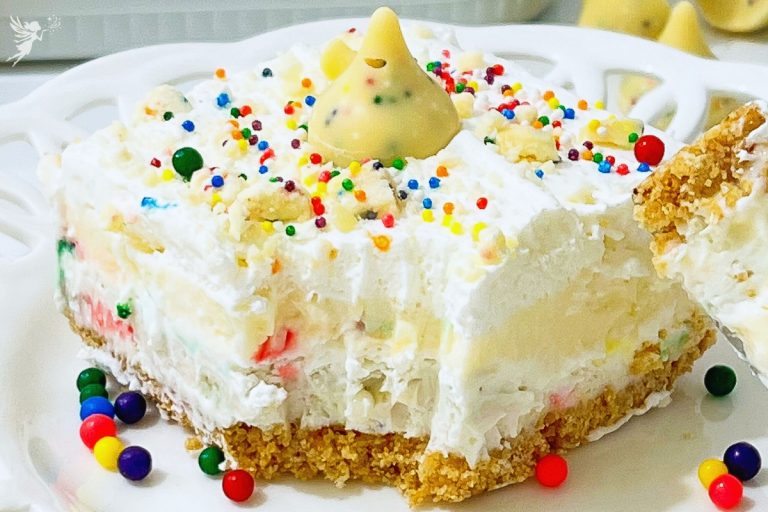
This Hershey’s Birthday Cheesecake is a creamy, colorful no-bake delight bursting with birthday magic. With a buttery graham cracker crust, fluffy cream cheese filling, vibrant pudding layer, and plenty of sprinkles, it’s a festive treat everyone will love.
- Total Time: 30 minutes
- Yield: 6–8 servings 1x
Ingredients
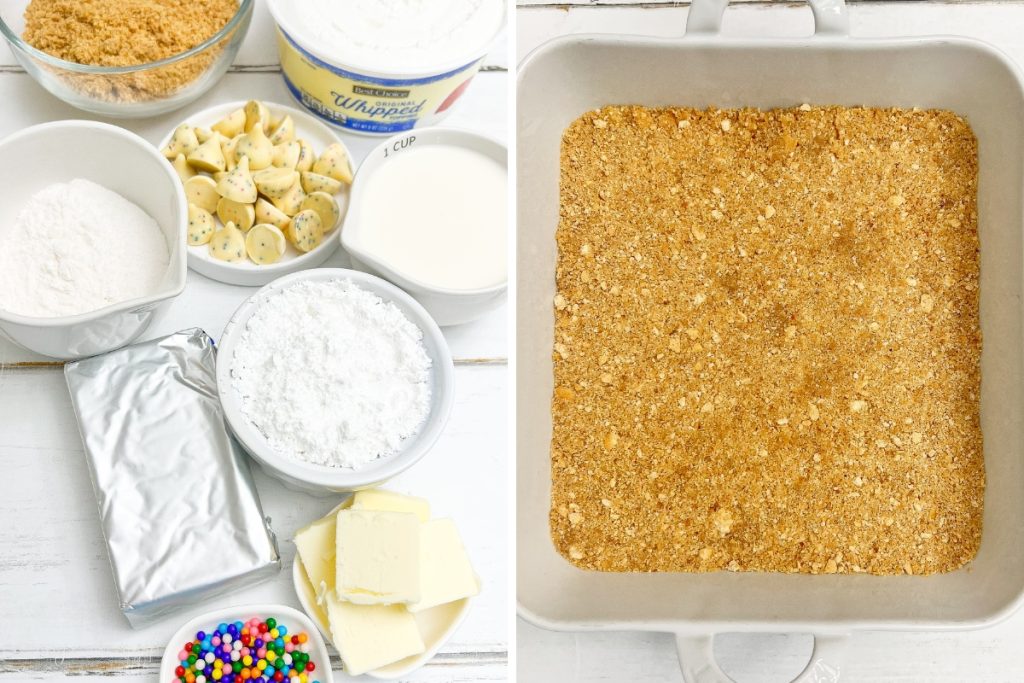
For the crust:
1 1/2 cups graham cracker crumbs
1/4 cup granulated sugar
1/2 cup melted butter
For the cheesecake layer:
8 oz cream cheese, softened
1 cup powdered sugar
1 teaspoon vanilla extract
1 cup Cool Whip (from the 16 oz container, reserve the rest for later)
For the Hershey’s layer:
8–10 Hershey’s Kisses Birthday Cake flavor, crushed in a food processor
For the pudding layer:
1 box cheesecake-flavored instant pudding mix (3.4 oz)
1 1/2 cups cold milk
1 cup Cool Whip (from the remaining container)
Sprinkles (rainbow or pastel)
For topping:
Remaining Cool Whip (should have about 1/2-1 cup left)
Extra sprinkles for garnish
Instructions
Make the Crust
- In a medium bowl, combine graham cracker crumbs, sugar, and melted butter.
- Press mixture evenly into the bottom of an 8×8 pan.
- Place in the freezer while you prepare the cheesecake layer.
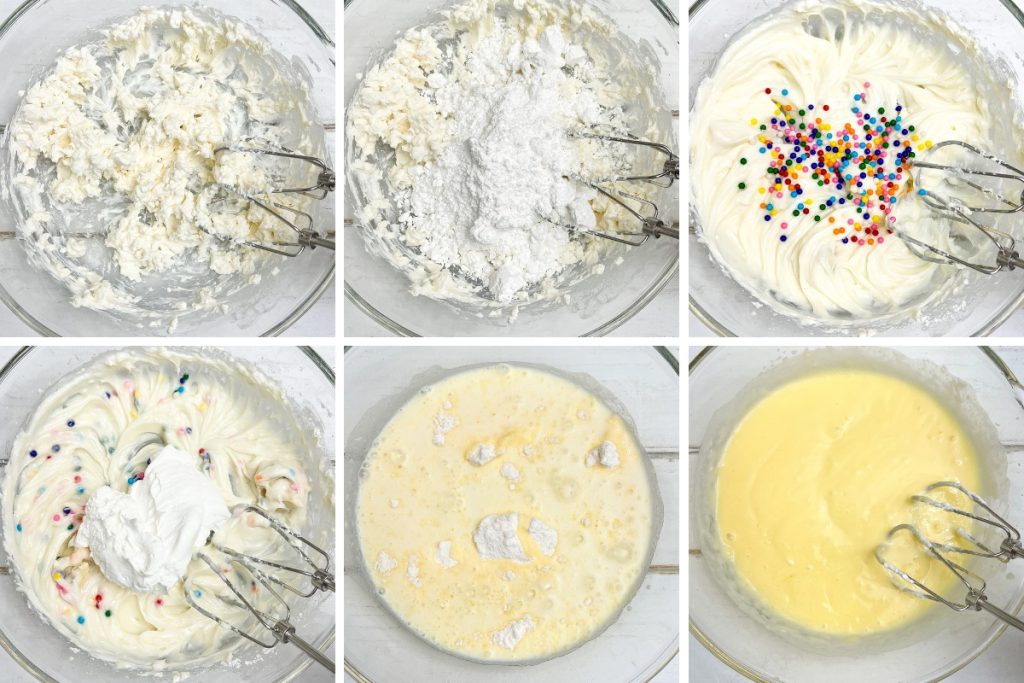
Make the Cheesecake Layer
- In a large bowl, beat softened cream cheese until smooth.
- Add powdered sugar, vanilla extract. Mix until fully combined.
- Fold in 1 cup Cool Whip until light and fluffy.
- Spread evenly over the chilled crust.
Add the Hershey’s Layer
- Crush Hershey’s Kisses Birthday Cake flavor in a food processor (or place in a bag and smash with a rolling pin).
- Sprinkle evenly over the cheesecake layer.
Make the Pudding Layer
- In a mixing bowl, whisk pudding mix with cold milk until it begins to thicken.
- Fold in 1 cup Cool Whip and sprinkles.
- Spread evenly over the Hershey’s layer.
Finish and Chill
- Spread remaining Cool Whip over the top.
- Add extra sprinkles for garnish.
- Cover and refrigerate for at least 4 hours, or overnight for best results.
Notes
- Crushing the Kisses: Pulse them in short bursts so you still have small chunks for texture.
- Butter flavoring: Adds that rich birthday cake taste—don’t skip it!
- Make ahead: This can be made 24 hours in advance and stored in the fridge.
- Freezer option: Freeze for 30–60 minutes before serving for a firmer texture (great for summer).
- Storage: Store covered in the refrigerator for up to 4 days. For longer storage, freeze individual slices in an airtight container for up to 2 months.
- Prep Time: 30 minutes
- Category: Cakes
Step-By-Step Process

Chill, serve and enjoy!
This Hershey’s Birthday Cheesecake is perfect for birthdays, kids’ parties, or any celebration that calls for something colorful and fun. Its creamy texture, chocolatey crunch, and bright sprinkles make it a guaranteed crowd-pleaser.
Plus, since it’s no-bake, you can prepare it ahead of time and focus on enjoying the festivities. For more simple and delicious ideas, explore my other party-friendly recipes that are just as easy and exciting.
If you loved this recipe, you’ll also want to try Colorful Confetti Dip, Mini Oreo Cheesecakes and these birthday breakfast ideas for even more sweet celebration treats.
© Little Party Pixie 2026