Ingredients
Scale
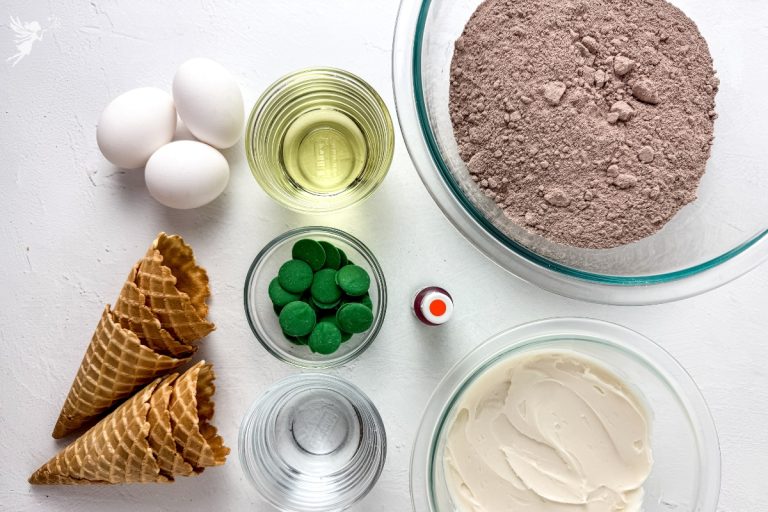
1 box cake mix
1/2 cup oil
1 cup water
3 eggs
8 ounces white buttercream
6 waffle cones
2 ounces green melting chocolate
Instructions
- Mix the ingredients for the cake mix according to the box.
- Put the cupcake liners in the muffin tin and use a spoon or ice cream scoop to fill the liners a third of the way.
- Place the waffle cones inside of the cupcake liners, open side down.
- Bake the cupcakes according to the instructions for cupcakes on the box.
- Allow the cupcakes to cool.
- While the cupcakes are cooling, place the buttercream in a medium size bowl and add 3-4 drops of orange gel color. Mix it until all the buttercream is orange, place the buttercream in a piping bag and secure the end.
- Next place the green chocolate melts in a microwave safe bowl, heat them in 30 intervals. Stir in between each interval until the melts are liquid.
- Put the chocolate in a piping bag and cut a medium size hole in the tip.
- On a sheet of parchment paper, pipe a vertical straight line about 2 inches long and then pipe several horizontal small lines from the vertical line. This will be the fronds for the carrot. Let the fronds sit for 5 to 10 minutes to dry. (Tip: if the frond feels too thin, pipe over the original to make it thicker.)
- Repeat this step for all the carrot cones you plan to make.
- Once the cupcake cones are completely cooled and the the fronds are dry, its time to assemble the cupcake carrot cones.
- Start by turning the cupcake cones upright, carefully remove the cupcake liner.
- Pipe the orange buttercream in a swirl around the cupcake portion of the cone, until it is completely covered.
- Stick the green chocolate frond in the top portion of the cupcake. Try to make sure its in the middle.
- Use the remaining green chocolate in the piping bag to pipe leaves shapes wherever the buttercream doesn’t cover the cupcake. Let the chocolate dry.
- Serve and Enjoy
Notes
- These cupcake cone carrots are best eaten fresh but they can be stored in air tight container in a the fridge for 2-3 days.
- If its hard to pipe on the cone while its in your hand, place the cone in a cup to hold it while you pipe around it.
- If you want to lay the cupcake cones on a flat surface without them losing their shape, place the cupcake cones in the fridge upright for about 10-20 minutes to ensure they will keep their shape.
- This recipe is for 6 cones but can be doubled to create more cones.
- Prep Time: 25 minutes
- Category: Sweet Treats