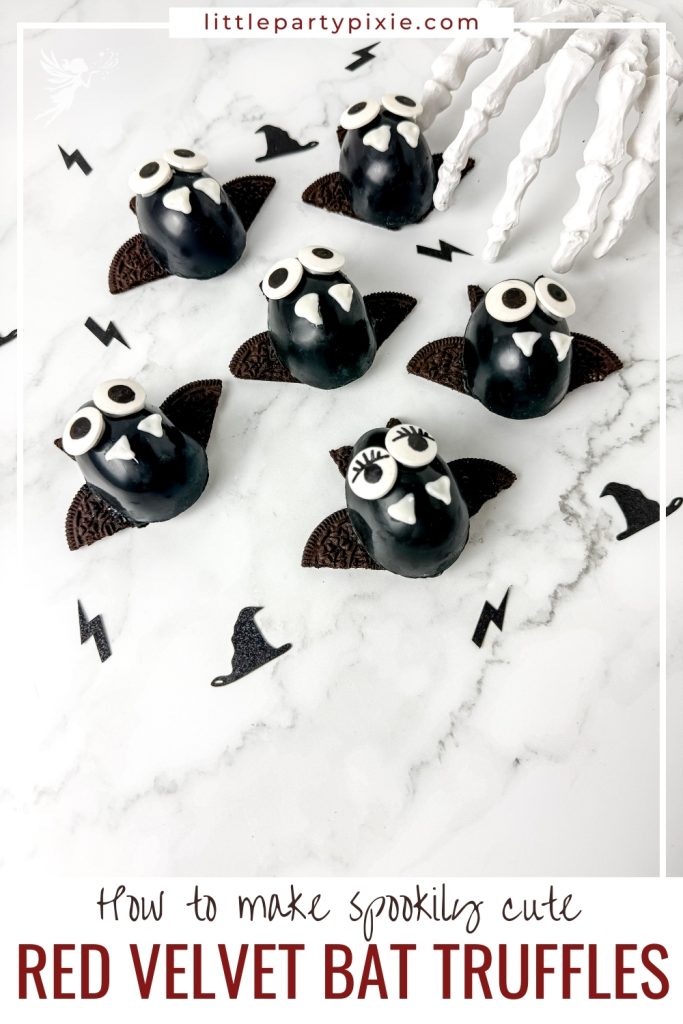
Festive Bat Truffles for Your Halloween Dessert Table
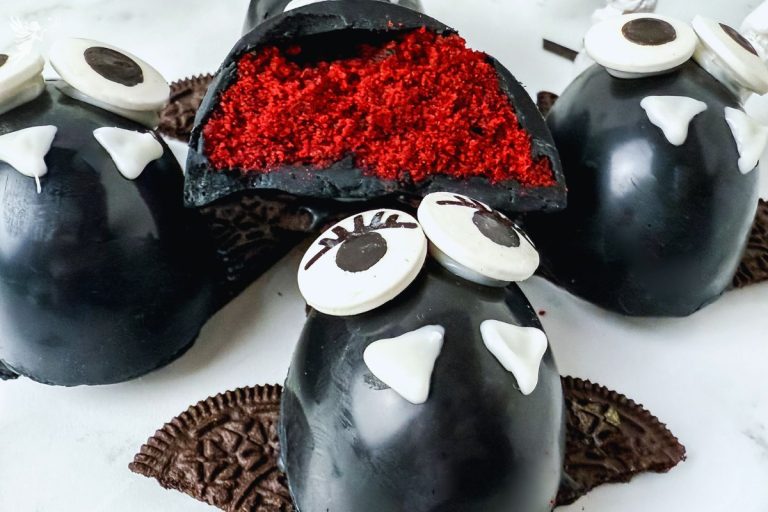
These Halloween Bat Truffles are a fun and delicious treat that combines rich chocolate with a surprise red velvet cake filling. They’re simple to make with just a few steps and require no baking, making them perfect for busy days when you still want something festive.
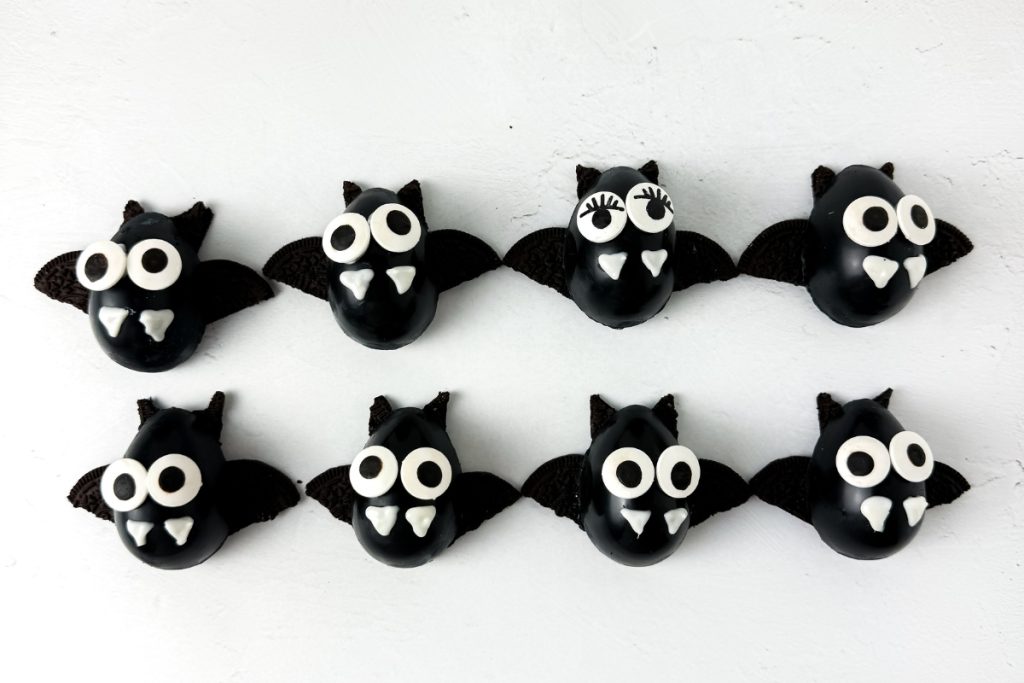
The creamy, chocolatey coating pairs beautifully with the moist red velvet center, creating a delightful bite that’s sure to impress kids and adults alike. I love how easy it is to customize them with candy eyes and cookie wings for a playful, spooky look.
Whether you’re hosting a Halloween party or preparing a themed dessert platter, these truffles bring both charm and flavor to the table. They’re proof that festive treats can be both simple and delicious.
Can’t make it now? Save it to Pinterest for later
Equipment You Will Need
- Spoon or spatula
- Piping bag
- Medium and small microwave safe bowl
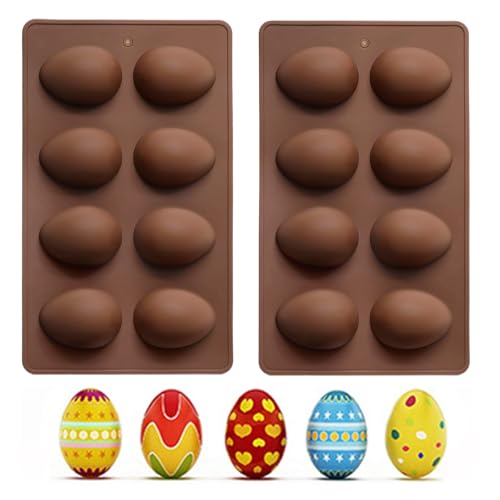
- Mold


Hallowen Bat Truffles Recipe
These Halloween Bat Truffles are rich, chocolatey treats stuffed with moist red velvet cake and shaped into cute bats. They’re an easy, no-bake dessert perfect for spooky parties or festive gatherings.
- Total Time: 56 minutes
- Yield: 8 1x
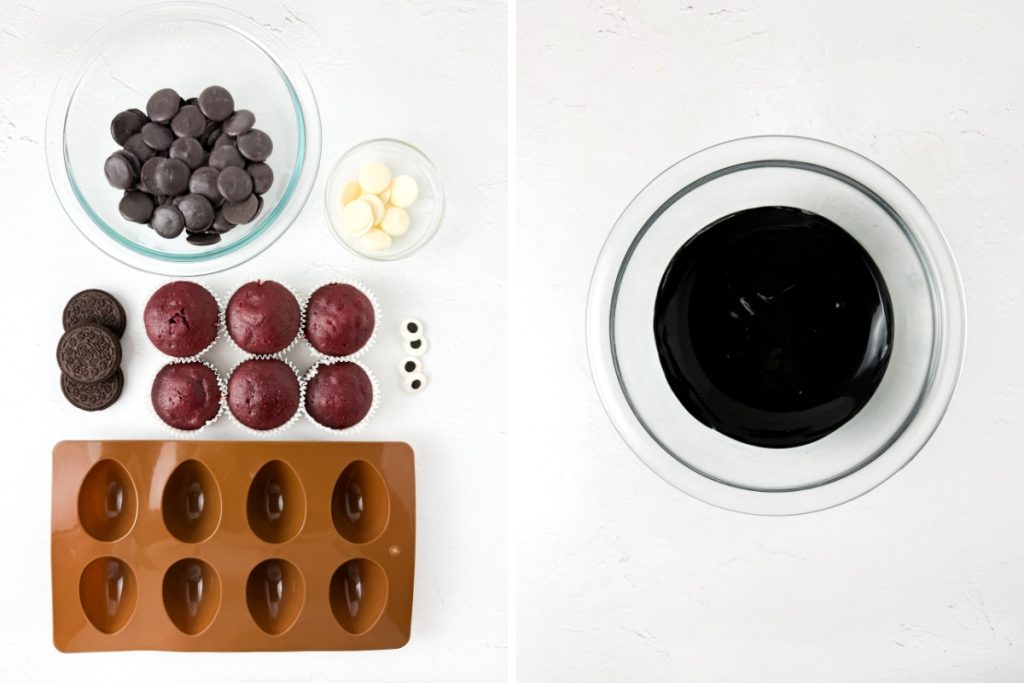
Ingredients
10 oz black chocolate melts
1 /2 oz white chocolate melts
4–6 red or red velvet cupcakes (preferred)
6 chocolate sandwich cookies
Eye sprinkles
Instructions
- Clean and dry your mold.
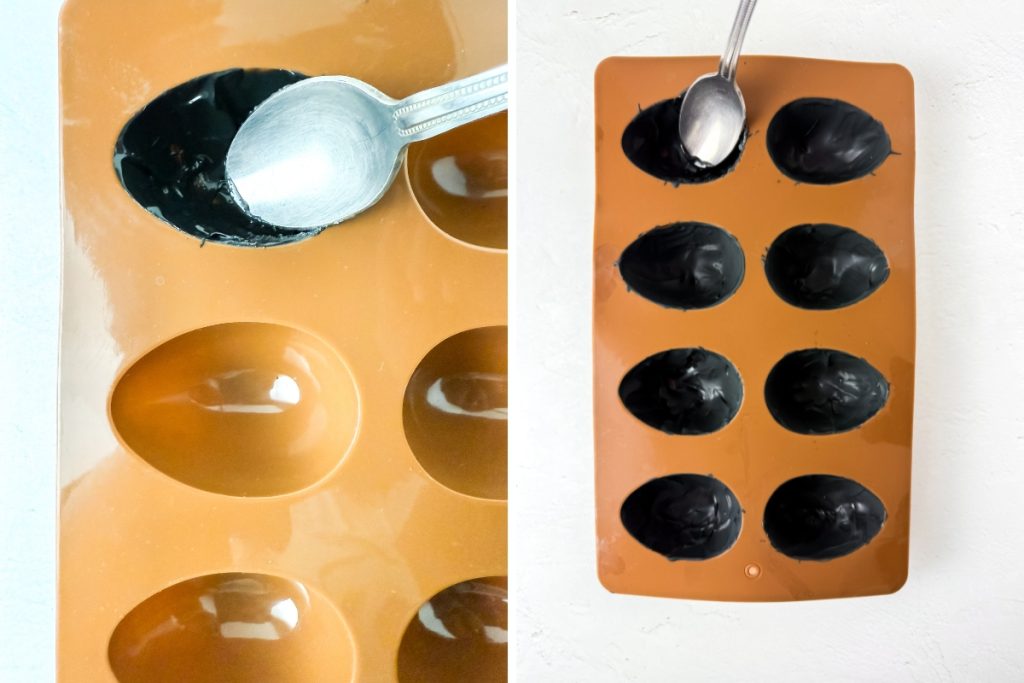
- Melt the black chocolate in a medium size microwave safe bowl in 15-30 second intervals until completely melted. Stir in-between each interval.
- Using a spoon or spatula for some chocolate in the mold, use the back of a spoon to spread the chocolate around the inside of each section in the mold. Then place the mold inside of the freezer for 10 minutes.
- Once the mold is removed from the freezer, add more chocolate to each section following the same instruction as above. Then place back in the freezer for 5 minutes. This is done to reinforce the sides so it won’t break.
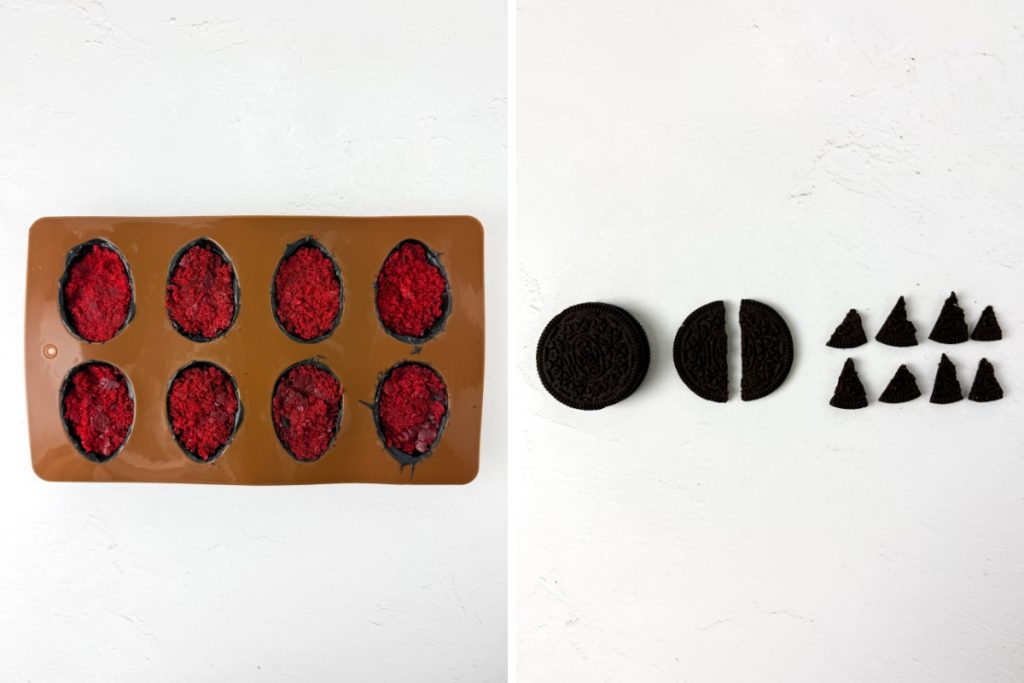
- Next put your cupcakes in the microwave for 5-10 seconds, then gently stuff half a cupcake in to the each chocolate covered section of the mold. Do not press too hard nor over fill the sections.
- Pour more of the black chocolate over the cupcakes the close the section. Place the mold back in the freezer for 5-8 minutes. If the chocolate you are trying to pour has hardened, put it in the microwave to remelt it before pouring over the cupcake.
- While the mold is in the freezer, remove the cream from the chocolate sandwich cookies. Next cut 4 pairs of the cookies in half and cut the rest cut into 8 triangles. Place them to the side for later.
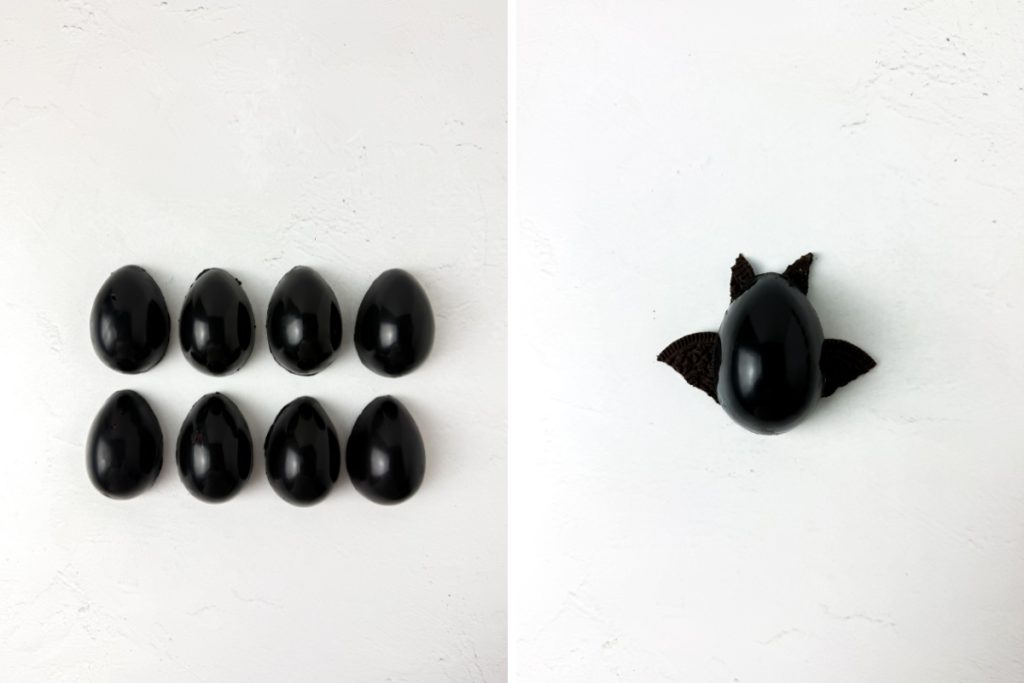
- Gently remove each truffle from the mold and lay them on a flat surface.
- Using the black melted chocolate, attach 2 cookie triangles to the smaller top of the truffle, and then use the chocolate to attach the larger cookie halves to the sides of the truffle to look like wings.
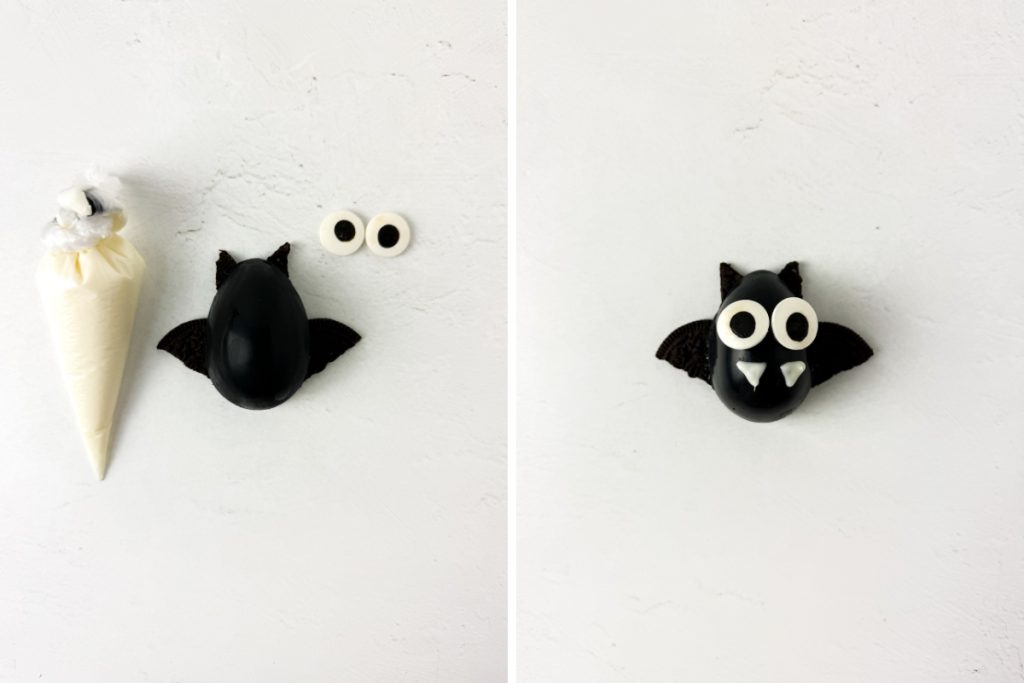
- Melt the white melting chocolate following the melting instructions above. Place the chocolate in a piping bag and cut a small hole in the tip.
- Pipe the white chocolate on the back of the eyeball sprinkles and place them at the top of the bat truffle.
- Right below the eyes, pipe 2 small triangles to be the bats teeth. Repeat this for each bat truffle.
- Let them sit for 3 minutes to dry, Serve and Enjoy!
Notes
- These These truffle can be stored in a airtight container in a cool dry place for 3 days and in the fridge for up to 5 days. The color on the eye sprinkles may run when they come back to room temperature.
- If your cupcakes are very crumbly, you can add 2 tablespoons of buttercream frosting to help the cupcakes stick together.
- I used red velvet cupcake but any red cupcakes will do. You can experiment with other flavors as well like strawberry.
- Prep Time: 38 minutes
- Idle Time: 18 minutes
- Category: Sweet Treats
Step-By-Step Process
These Halloween Bat Truffles are perfect for Halloween parties, school events, or even a fun weekend activity with family and friends. Their red velvet surprise makes them an unexpected delight for guests.
Since they’re no-bake and easy to assemble, they fit right into your holiday plans without extra fuss. For more festive and party-ready ideas, be sure to explore my other creative party food recipes.
If you enjoyed this recipe, try the Mummy Pop Tarts or the Spooky Fruit Hand Pies for more Halloween fun.
© Little Party Pixie 2026