
50 Genius Christmas Gift Wrapping Hacks (That Make You Look Like a Pro)
Confession: I actually love gift wrapping. Give me some pretty paper, ribbon and a little time, and I’m quite happy to lose an afternoon making everything look lovely. I’ve even convinced myself that crisp corners and perfectly tied bows are a life skill. There’s nothing quite like seeing a pile of beautifully wrapped presents under the tree.
But I also know the reality isn’t always so pretty. Awkward-shaped gifts, missing tape and paper that’s two inches too short can quickly turn wrapping into a Christmas nightmare. And if you’ve ever found yourself surrounded by half-wrapped presents on the 23rd, quietly questioning your life choices, believe me, I’ve been there!
So I’ve gathered 50 of my favourite gift-wrapping hacks and Christmas wrapping ideas to help you save time, tackle tricky gifts, and make everything look lovely without spending a fortune. Because wrapping presents should be part of the Christmas fun, not the thing that tips you over the edge!
No time to plan now? Save these ideas to Pinterest for later
Gift Wrapping Hacks That Save Time
If there’s one thing I’ve learnt over the years, it’s that Christmas wrapping takes considerably longer when you’re constantly stopping to find the scissors, untangle ribbon or hunt for the tape. A little preparation goes a long way. These first few tricks will help you get into a wrapping rhythm and spend less time faffing about.
1. Set Up a Wrapping Station
Before you start, gather everything you’ll need in one place: wrapping paper, scissors, tape, ribbon, gift tags, pens and a ruler. I like keeping smaller supplies together in a basket or storage caddy so they’re easy to grab.
If you have the space, dedicate one end of a dining table or desk to wrapping for a few days. No more balancing rolls of paper on the sofa or discovering you’ve left the scissors upstairs just as you’re getting into your stride!
2. Wrap Gifts in Batches
Rather than wrapping one present from start to finish before moving on to the next, try working in batches. Sort gifts by size, choose the appropriate paper, cut your sheets and wrap several at a time.
You can also cut all your ribbon lengths together and add gift tags once everything is wrapped. It’s a surprisingly effective way to speed things up, especially when you have a whole family’s worth of presents to get through.
3. Measure With the Gift Itself
You don’t need a measuring tape for every present. Place your box on the wrapping paper and roll it over to check how much you’ll need, allowing around two inches of overlap at the seam.
For the ends, make sure there’s enough paper to fold neatly over both sides without leaving excessive bulk. A little practice makes this almost second nature, and you’ll waste far less paper than by cutting generously and hoping for the best!
4. Buy Wrapping Paper With Grid Lines
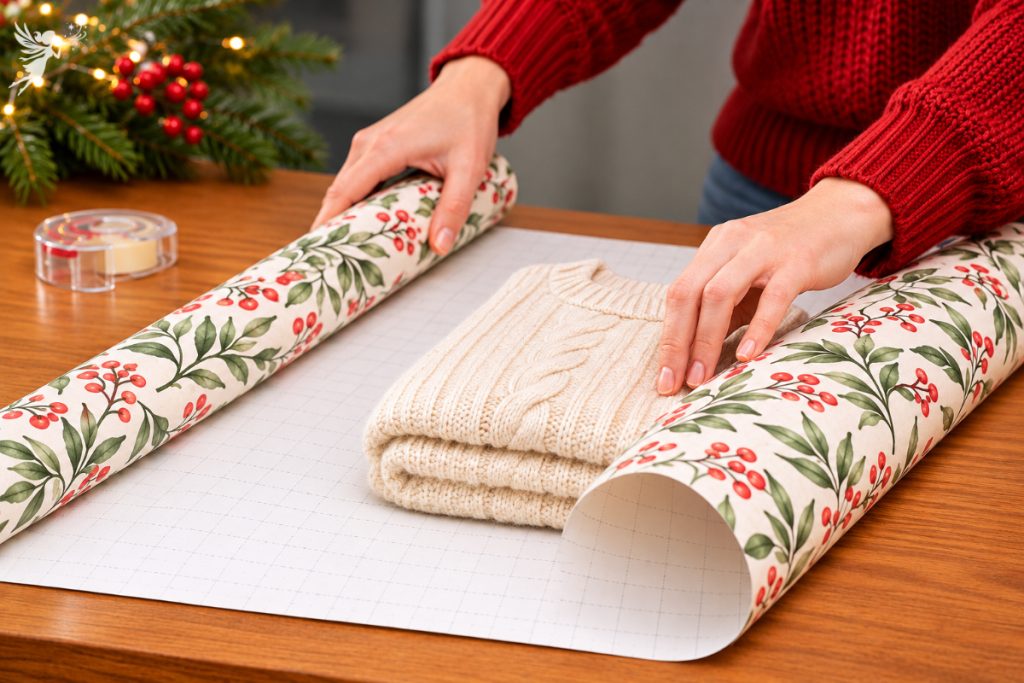
Ever cut a sheet of wrapping paper only to discover you’ve gone slightly wonky? Paper with grid lines printed on the reverse makes getting straight, even cuts much easier.
The grid is particularly useful when wrapping multiple boxes of similar sizes, as you can quickly measure and repeat your cuts. It might cost a little more than basic paper, but the time saved and reduced waste can make it worthwhile.
5. Use Double-Sided Tape for Invisible Seams
If you love that beautifully finished boutique look, double-sided tape is your friend. Rather than sticking regular tape across the visible seam, place a few strips underneath the overlapping edge of the paper.
Press the paper down firmly, and you’ll have a much cleaner finish, without shiny strips of tape interrupting your carefully chosen wrapping paper. It’s a small change that makes an ordinary gift look considerably more polished.
6. Wrap Diagonally When Paper Runs Short
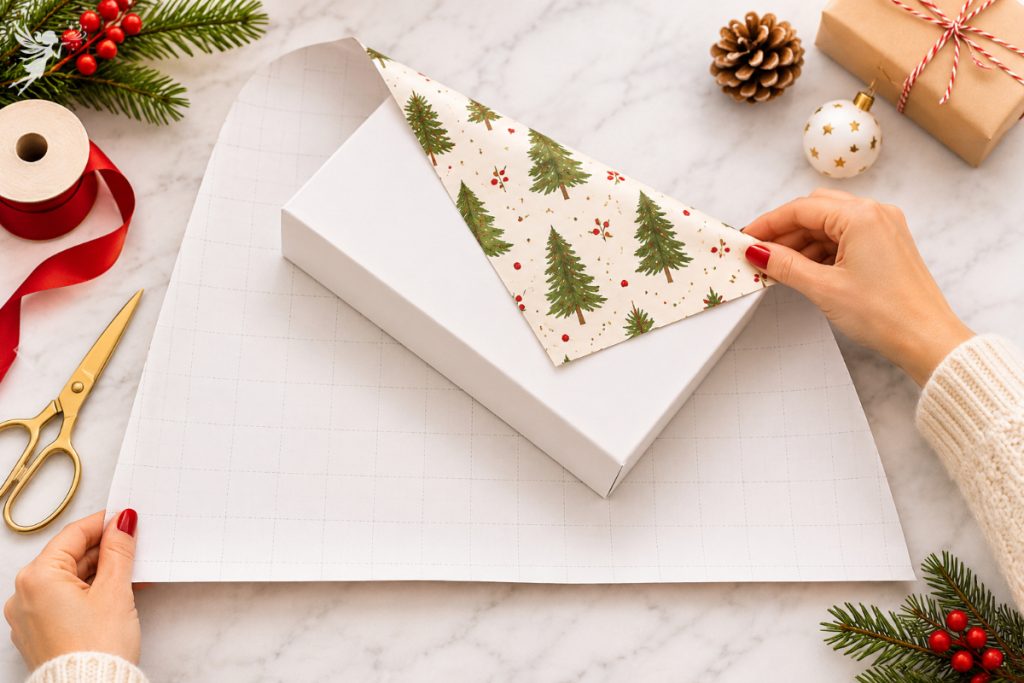
This is one of those tricks that feels like a little bit of Christmas magic! If your sheet of wrapping paper looks just slightly too small, try placing the box diagonally rather than straight across the paper.
Bring the corners up and over the box, folding them neatly as you go. The diagonal position can give you extra coverage without needing another sheet. If there’s still a small gap, a wide ribbon band can conceal the join beautifully.
7. Anchor Your Ribbon With a Tape Tab
There’s nothing more annoying than getting your ribbon perfectly positioned, only for it to slide off the box while you’re trying to tie the bow.
Before wrapping the ribbon around the present, secure one end underneath the box with a small piece of tape. You can also add a discreet tape tab where the ribbon crosses at the back. It keeps everything in place while you work and makes centering your bow much easier.
8. Turn Wrapping Into a Movie Night
If you have a mountain of presents to wrap, don’t leave it all for one exhausting evening. Put on a favourite Christmas movie, make yourself a hot chocolate (or something a little stronger once the kids are in bed!) and work through a batch of gifts.
You could even make it a little tradition, spreading the wrapping over two or three evenings rather than turning Christmas Eve into a marathon. It’s much easier to enjoy the process when you’re not racing against the clock.
Wrapping Paper vs. Gift Bags vs. Baskets
Not every present needs to be wrapped in paper. In fact, choosing the right packaging can save you a surprising amount of time, especially with awkward shapes, soft items, or a collection of smaller presents.
9. Use Paper for Boxes and Bags for Everything Else
Beautifully wrapped boxes are lovely, but wrapping a teddy bear, a collection of toiletries, or a pile of oddly shaped toys can test even the most patient wrapper.
As a general rule, save wrapping paper for gifts with reasonably straight edges and reach for a gift bag when things get awkward. You’ll use less paper, spend less time wrestling with corners and often end up with a much neater result.
10. Use Tissue Paper to Dress Up Gift Bags
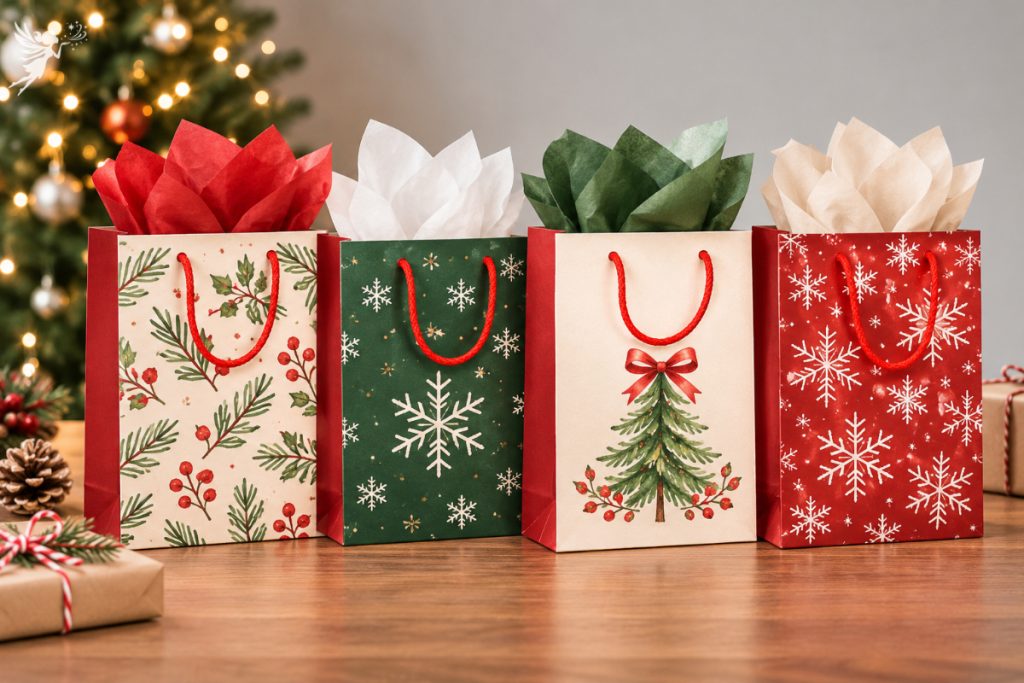
A plain gift bag can look surprisingly special with a little thought. Start with two or three sheets of tissue paper, layer them together and place them inside the bag so the corners sit above the handles.
Gently lift and fan out the tissue to create some height. Try combining two complementary colours, such as blush pink and white, or traditional red and green. This simple trick makes even an inexpensive gift bag feel more thoughtfully presented.
11. Decorate a Plain Paper Gift Bag
You don’t need to buy expensive printed gift bags to get a lovely result. Plain kraft paper or white bags are inexpensive and provide a blank canvas for a little creativity.
Swap ordinary paper handles for satin ribbon, tie a sprig of greenery around one handle or attach a pretty gift tag. You could even use a rubber stamp to add a simple festive pattern. Keep the decoration fairly minimal, and you’ll have something that looks much more expensive than it actually was.
12. Let the Container Become Part of the Gift
One of my favourite shortcuts is to choose a container that becomes part of the present itself. A pretty mixing bowl filled with baking accessories, a tote bag packed with goodies, or a cookie tin filled with homemade treats can all make lovely gifts without extra wrapping.
Think about what the recipient might actually use afterwards. A tea towel can hold a selection of kitchen treats, while a cosy scarf can bundle a few smaller gifts together. It’s practical, attractive and means less wrapping paper to deal with afterwards.
13. Build a Themed Gift Basket
Gift baskets are a wonderful way to bring several smaller presents together into one thoughtful gift. They’re particularly useful when you have lots of little items that might otherwise look underwhelming on their own.
Try a hot chocolate basket with mugs, marshmallows and chocolate spoons, or a movie-night basket with popcorn, sweets and cosy socks. Start with a sturdy basket, add tissue paper or shredded paper to create a base, then arrange the tallest items towards the back. A little cellophane and ribbon will tie it all together.
14. Wrap a Basket With Cellophane and Ribbon
If you want your gift basket to look like something from a boutique, cellophane is an easy finishing touch.
Place your filled basket in the centre of a large sheet, bring the sides upwards and gather them together above the tallest item. Secure with a twist tie or ribbon, then finish with a generous bow. Make sure the cellophane is pulled reasonably tight so the contents don’t shift around.
It’s especially useful for food gifts, pamper hampers and collections of smaller presents that you want to keep together.
15. Keep Gift Bags for Last-Minute Presents
There’s absolutely no shame in having a stash of gift bags ready for those presents that sneak up on you. In fact, I’d argue they’re an essential part of any Christmas wrapping kit!
Keep a few different sizes tucked away with some tissue paper and spare tags. When you’re short on time, pop the gift inside, add some tissue and attach a tag. It takes barely a minute and saves you from the dreaded late-night wrapping session.
How to Wrap Awkward Gifts
Every Christmas gift list seems to include a few troublemakers. There’s always something that’s too big, too oddly shaped, or simply refuses to sit neatly under a sheet of wrapping paper. Here are some clever ways to tackle those awkward presents.
16. Gather Odd Shapes Into a Bundle
For gifts that are awkward to wrap individually, try the gathered-paper method. Place the item in the centre of a large square of wrapping paper or cellophane, then bring all four corners upwards and gather them together at the top.
Secure with ribbon and fluff out the paper to create a pretty gathered finish. It works particularly well for soft toys, collections of smaller gifts and items that don’t have a convenient box.
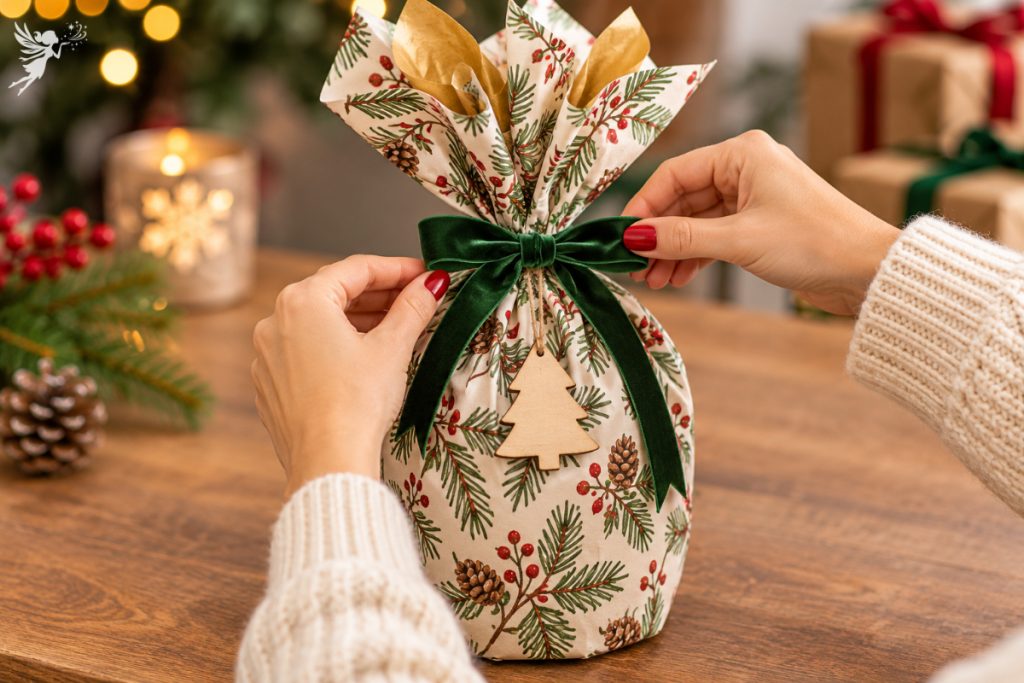
17. Dress Up a Bottle
Bottles can be surprisingly fiddly to wrap, particularly when you’re trying to get neat folds around the neck. A dedicated bottle gift bag is the easiest solution, but prettier alternatives are available.
Try wrapping the bottle in tissue paper, allowing plenty of extra material at the top, then gathering it around the neck with ribbon. Alternatively, use a tea towel or cloth napkin and tie it in place with twine. This works beautifully for wine, olive oil or a special bottle of something for a foodie friend, and the fabric becomes part of the gift.
18. Roll Clothing Instead of Folding It
Not every clothing gift needs to go into a box. Scarves, T-shirts, pyjamas and lightweight clothing can be rolled neatly and secured with ribbon for a simple, space-saving presentation.
For a more traditional finish, fold clothing into a shirt box and layer tissue paper between the items. If you’re wrapping something particularly soft, such as a sweater, consider placing a piece of cardboard underneath to give it a little structure. It makes the finished package much easier to handle.
19. Make Gift Cards and Cash Feel Like Real Presents
Gift cards and money are wonderfully practical, but handing someone a little envelope can sometimes feel a bit underwhelming.
Give them a proper presentation instead. Place a gift card inside a small jewellery box, tuck cash into a decorative envelope or roll banknotes into a clear, fillable ornament. You could even hide a gift card inside a larger box filled with tissue paper. It’s a little extra effort, but it makes the recipient feel as though they’ve opened a proper present.
We have more ideas for presenting gift cards and experience voucher gifts over here!
20. Skip Traditional Wrapping for Oversized Gifts
Trying to wrap a bicycle, large toy, or piece of furniture with several sheets of paper can quickly become frustrating. The joins rarely look particularly neat, and you’ll probably use far more paper than you intended.
Instead, consider using a large fabric sheet, an old tablecloth or a festive blanket to cover the item. A giant bow or oversized gift tag can finish the look. For particularly large presents, a simple ribbon tied around the item may be all you need.
21. Wrap Long, Skinny Gifts Candy-Style
Umbrellas, rolled posters, sports equipment, and long toys can be hard to wrap neatly with traditional box-wrapping techniques.
Try the candy-wrapper approach instead. Place the item in the centre of a long strip of paper, roll it up and secure the seam underneath. Twist or gather the excess paper at both ends and tie with ribbon. It looks playful, takes very little time and is much easier than trying to fold neat corners around a long, narrow object.
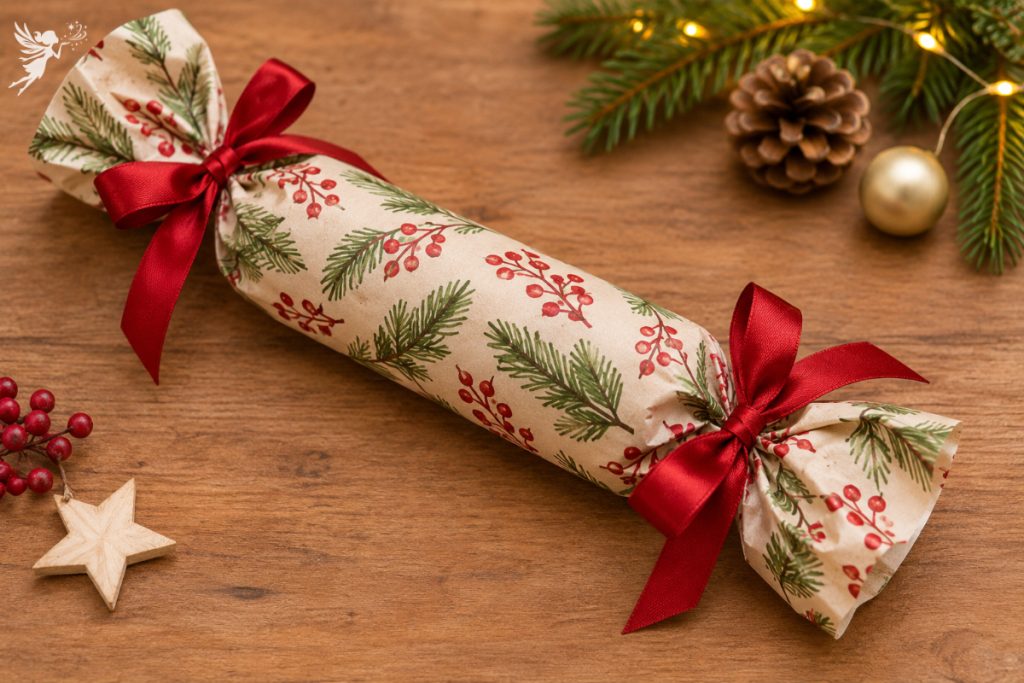
22. Package Homemade Food Gifts Properly
Homemade biscuits, fudge, sweets and other edible treats make lovely Christmas gifts, but presentation and food safety both matter.
Use food-safe bags or containers, line tins with parchment where appropriate and make sure everything has cooled completely before packaging. Tie with festive ribbon and add a little tag naming the treat, along with any relevant allergen information. A small batch of homemade cookies can look wonderfully thoughtful when presented in a simple tin or cellophane bag.
How to Disguise Obvious Gifts
Some presents are a little too easy to guess. A book is a book, a football looks suspiciously round and children seem to have an extraordinary ability to identify presents simply by giving them a good shake. A little creative packaging can keep everyone guessing until Christmas morning.
23. Use a Bigger Box
If a present has an unmistakable shape, put it inside a larger box before wrapping. Fill the extra space with tissue paper, shredded paper or other suitable packing material so the gift doesn’t move around too much.
This works particularly well for smaller toys, gadgets and accessories. Just remember that you don’t need to go completely overboard with the box size. The aim is to disguise the shape, not make someone think they’ve been given a new television!
24. Add a Decoy Rattle
For a gift that makes a distinctive sound when shaken, add a harmless distraction. Place a small sealed bag containing a few dried beans or beads in the outer packaging, away from the actual present, so it creates a different sound.
Make sure everything is securely enclosed and that small loose items are out of reach of young children or pets. It’s a playful little trick for older children and adults who enjoy guessing what’s inside their presents.
25. Break Up the Shape With Fabric
A flat gift such as a book, notebook or tablet case can be surprisingly easy to identify through wrapping paper. One way to disguise it is to wrap it in a scarf, tea towel or another piece of fabric first.
The extra layer changes the shape and feel of the present, while also giving the recipient something extra to unwrap. You can then place the bundle inside a box or gift bag for a more traditional presentation.
26. Use an Unexpected Container
Sometimes the easiest way to disguise a present is to put it somewhere nobody expects. A small gadget inside a plain shoebox, jewellery tucked into a larger toiletries box, or a board game hidden inside an ordinary storage box can all throw off a curious gift guesser.
Just make sure the outer container is clean and in good condition. No need to rummage through the recycling for something truly questionable!
27. Write a Decoy Gift Tag
For adults and older children with a good sense of humour, a misleading gift tag can add an extra layer of fun.
Try labelling a particularly exciting present as something completely ordinary, such as ‘Socks’, ‘New Dishcloths’ or ‘Practical Household Supplies’. It’s a silly little touch, but watching someone open a gift they thought was something else can be half the fun.
28. Layer It Like a Nesting Doll
Want to make a small present last a little longer? Try wrapping it in several layers of paper, using different colours or patterns for each one.
Place the gift in the centre of the first layer, wrap it, then repeat with progressively larger sheets. You could even add a little note or joke between some of the layers. This works particularly well for small gifts and stocking fillers, although I’d probably avoid it for anyone who gets impatient easily!
Wrapping the Santa Gifts Separately
If Santa still makes an appearance in your home, you’ll know that keeping the magic alive can involve a surprising amount of organisation. Children are observant, and the last thing you want is for them to recognise the wrapping paper from a roll they’ve already seen in the cupboard!
29. Buy a Separate Roll Just for Santa
Choose one distinctive wrapping paper that is reserved exclusively for Santa’s presents. Keep it separate from your everyday Christmas wrapping supplies, ideally somewhere the children won’t stumble across it.
It could be a traditional red-and-gold design, a special snowy pattern or something completely different from the paper used for family gifts. The important thing is consistency. If Santa always uses the same paper, children won’t spot familiar wrapping appearing elsewhere.
30. Give Santa His Own Gift Tags
Create or buy a set of special ‘From Santa’ gift tags and use them consistently on all the presents he leaves.
You could choose a different style from your regular family gift tags, perhaps a traditional kraft design with red ribbon or a little snowflake motif. Keep the tags with Santa’s wrapping paper so they’re ready when you need them.
31. Change Your Handwriting
If you’re handwriting Santa’s gift tags, try making them look a little different from your usual writing. Printing in block capitals, using a different pen or asking another adult to write the tags can all help.
Alternatively, print your tags directly from the computer. It’s a simple way to avoid having your own handwriting appear on every present from the big man himself!
32. Wrap Santa’s Gifts Somewhere Else
If your children are particularly good at spotting things, wrapping Santa’s presents somewhere outside the house might be worth considering.
A friend’s house, the office or even the boot of your car can provide a little privacy. If you have to wrap at home, wait until the children are asleep and clear away every last scrap of paper afterwards. Those little offcuts can be surprisingly revealing!
33. Give Santa a Signature Touch
A special finishing detail can make Santa’s gifts feel even more magical. Try adding a small jingle bell, a candy cane or a particular style of ribbon to every present.
You could even create a little tradition where Santa always uses a certain colour or leaves a tiny handwritten note. Children love these small details, and they can become part of the excitement and anticipation of Christmas morning.
34. Turn Santa’s Workshop Into a Wrapping Party

If you’re facing a mountain of presents, why not make an evening of it? Invite a friend or two over for a little wrapping party, put on some Christmas music, bring out the snacks and tackle your gift lists together.
You could even make it a festive girls’ night with a glass of wine and a few nibbles. Our Santa’s Workshop & Wine Night invitation would be a fun way to get everyone in the mood.
Just make sure everyone brings their own wrapping supplies, or you’ll spend the evening fighting over the good scissors!
Elegant Gift Wrapping Ideas on Any Budget
You don’t need expensive paper, elaborate bows or a professional gift-wrapping service to make your presents look beautiful. Often, the secret is simply choosing a few complementary colours and paying attention to the finishing details.
35. Stick to Two or Three Colours
One of the easiest ways to make your presents look coordinated is to choose a small colour palette and use it throughout your wrapping.
Traditional red, green and gold is always lovely, while cream, kraft and sage green create a softer, more natural look. You don’t need every present to be identical, either. Mixing a few different patterns and textures within the same colour family gives the tree a more considered appearance.
36. Try a Monochrome Wrapping Scheme
For something a little more understated, choose one colour and experiment with different shades and textures.
All-white wrapping with cream ribbon, for example, can look beautifully elegant. Mix matte paper with glossy ribbon, add a velvet bow, or use a textured gift tag to create interest. It’s a lovely approach if you prefer a more neutral Christmas colour scheme.
37. Try Black Paper With Gold Accents
Black and gold might not be the first Christmas colour combination that springs to mind, but it can look wonderfully sophisticated.
Use plain black paper as your base, then add gold ribbon, metallic gift tags or a little gold twine. You don’t need much decoration to make it work. In fact, keeping things simple is what gives this combination its smart, modern finish.
38. Invest in a Few Good Quality Ribbons
Ribbon can make an enormous difference to a present’s finished appearance. Even inexpensive wrapping paper looks more luxurious when paired with a beautiful ribbon.
Velvet, satin and wired ribbons are particularly useful because they hold their shape and create fuller bows. If you’re buying only a few colours, choose versatile shades that will work with several different wrapping papers. A good-quality ribbon can also be carefully removed and reused.
39. Add Greenery or Dried Orange Slices
For a natural, traditional Christmas look, tuck a little greenery under your ribbon before tying the bow.
Small sprigs of rosemary, pine or eucalyptus work beautifully, while dried orange slices add a lovely pop of colour. You could also use a cinnamon stick or a small bundle of dried flowers. It’s an inexpensive way to add texture and a little festive fragrance without needing lots of extra decoration.
40. Use Kraft Paper for a Minimalist Look
Brown kraft paper is one of the most versatile wrapping supplies you can buy. It works beautifully with traditional, rustic and modern Christmas styles, and it’s usually more affordable than heavily patterned paper.
Pair it with white ribbon and twine for a simple Scandinavian-inspired look, or add red velvet ribbon for something more traditional. You can even decorate it with a few hand-stamped snowflakes or a sprig of greenery. The beauty of kraft paper is that it doesn’t need much to look lovely.
41. Sharpen Every Fold for a Professional Finish
If you want your gifts to look like they’ve been wrapped by someone who really knows what they’re doing, pay attention to the folds.
Once you’ve folded the paper over the box, run your finger firmly along each edge to create a crisp crease. You can also use the flat edge of a ruler or an old loyalty card to sharpen the fold.
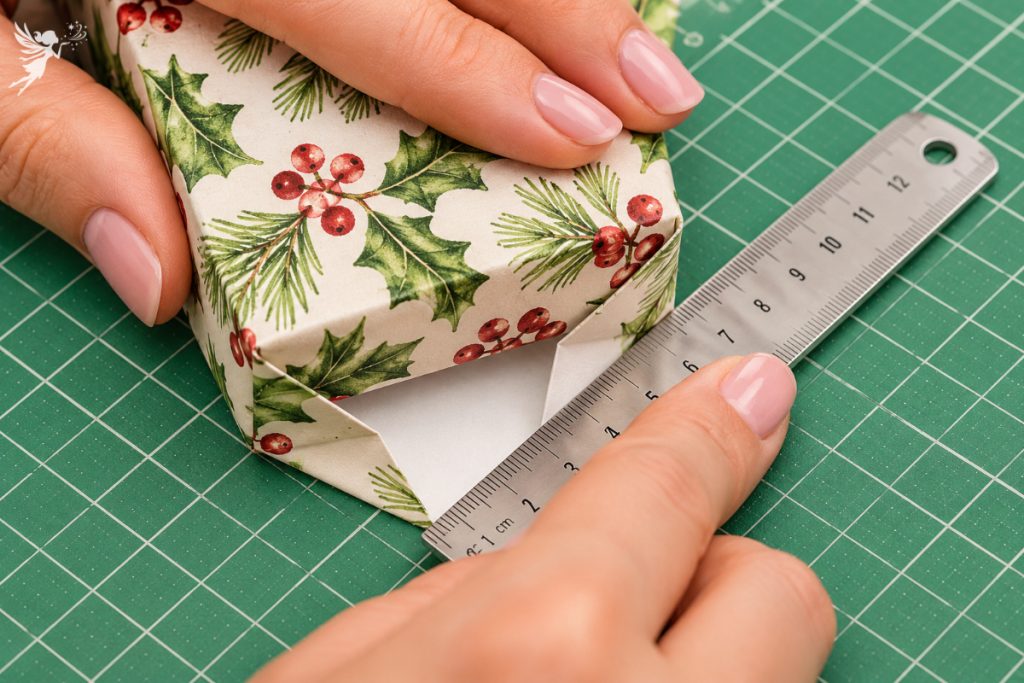
Take a little extra care with the corners, making sure the paper lies flat rather than bunching up. It’s one of the simplest ways to make an ordinary wrapped box look beautifully finished.
Ways to Save Money on Wrapping
With presents to buy, food to prepare and a seemingly endless Christmas to-do list, wrapping supplies can become another unexpected expense. Fortunately, you don’t need to spend a fortune to make your gifts look lovely.
42. Use Kraft Paper or Brown Grocery Bags
Plain kraft paper is often much cheaper than decorative Christmas wrapping paper, and it’s surprisingly versatile. You can also cut open clean brown paper grocery bags and use them as wrapping sheets.
For a more personal touch, let the children decorate some sheets with festive drawings or simple stamps. It won’t look like expensive boutique wrapping, but it will have plenty of character and can be a lovely way to involve little helpers.
43. Save and Reuse Gift Bags, Boxes and Tissue
Before throwing away gift bags and boxes after Christmas, check whether they’re still in good condition. Many can be reused for another year, particularly sturdy bags and gift boxes.
Keep a small storage box for reusable wrapping supplies and fold bags flat to save space. Tissue paper can also be smoothed out and reused, as long as it isn’t too crumpled or torn. You’ll be surprised how quickly your little collection grows, and it’s much nicer than buying everything again next December.
44. Try Fabric Gift Wrapping
Fabric wrapping is a lovely alternative to paper, particularly if you’re looking for something reusable and a little different.
Use a scarf, tea towel, cloth napkin or piece of fabric to wrap the present, folding the corners over and securing them with a simple knot or ribbon. You can also experiment with traditional Japanese furoshiki wrapping techniques, which use clever folds and knots to hold gifts in place.
The best part? The fabric becomes part of the gift, so there’s no waste and nothing to throw away.
45. Shop the After-Christmas Sales
One of the easiest ways to save money on next year’s wrapping supplies is to shop the sales after Christmas.
Wrapping paper, gift bags, ribbon and festive tags are often heavily discounted in the days following Christmas. Stock up on versatile designs and plain colours that won’t look dated next year. Keep everything together in a labelled storage box so you’re ready to go when December rolls around again.
46. Print Your Own Gift Tags
Beautiful gift tags can be surprisingly expensive, particularly if you’re buying enough for a large family. Printing your own is an easy way to save a little money while keeping your wrapping coordinated.
Use cardstock rather than regular printer paper for a sturdier finish, then cut out the tags and punch a small hole for ribbon or twine. You can find plenty of free printable Christmas gift tags online, or create your own in Canva to match your chosen wrapping colours.
Hiding Gifts Once They’re Wrapped
You’ve done the hard work, everything is beautifully wrapped, and you’re feeling rather pleased with yourself. Now comes the challenge of keeping those presents hidden until Christmas morning! If you have curious children (or pets with a particular interest in ribbons), a little planning can save you from a few unwanted surprises.
47. Hide Gifts in Plain Sight
Sometimes the best hiding place is somewhere nobody would think to look. Suitcases, storage boxes, the back of a wardrobe or even a laundry basket covered with a pile of towels can all work surprisingly well.
You could also use boxes labelled with something completely uninteresting, such as ‘Winter Clothes’ or ‘Old Documents’. Just make sure you remember what’s inside! If you have particularly determined little detectives at home, spreading gifts across a couple of hiding places is probably safer.
48. Keep a Hidden-Gift List
This is one piece of Christmas organisation I would strongly recommend. If you’re buying gifts throughout the year and hiding them away, it’s surprisingly easy to forget what you’ve bought or where you’ve put it.
Keep a simple note on your phone or a spreadsheet listing each present, who it’s for and where it’s hidden. You can even add a tick box once it’s wrapped. It saves you from discovering a forgotten present in July or, worse, buying something twice because you’ve forgotten you already have it!
49. Use Code Tags Instead of Names
If you have children who enjoy inspecting every present under the tree, try using codes rather than writing names on the tags.
Assign each family member a colour, symbol, or simple number, and keep a little key somewhere safe. It won’t stop the most determined detectives, but it can make identifying presents a little harder. It’s also useful if you have several gifts that need to stay anonymous until Christmas morning.
50. Hold Back the Tree Pile Until Christmas Eve
If your children are particularly curious about what’s under the tree, you don’t have to put every present out as soon as it’s wrapped.
Keep gifts safely stored away and bring them out on Christmas Eve, when the excitement is already building. This is especially useful for younger children who might be tempted to shake, squeeze or carefully inspect every parcel they can reach.
And if you have pets who see Christmas ribbon as a personal invitation to play, keeping presents tucked away until the last minute can save a lot of trouble too!
Wrap Early, Stress Less
If there’s one thread running through all 50 of these ideas, it’s planning early. Wrapping a few gifts at a time while you watch a movie is far more enjoyable than a Christmas Eve sprint when you’re running on empty. Our guide to planning Christmas early walks you through the timeline, so wrapping, shopping and hosting all happen without the last-minute scramble.
Still Looking For Ideas for Everyone on Your List?
Browse our Christmas gift guides for everyone on your list, from family and friends to coworkers, teachers and neighbors, and find the perfect present for every person before the paper comes out.

© Little Party Pixie 2026